> For the complete documentation index, see [llms.txt](https://wiki.polymaker.com/llms.txt). Markdown versions of documentation pages are available by appending `.md` to page URLs; this page is available as [Markdown](https://wiki.polymaker.com/polymaker-wiki/polymaker-wiki-pt/dicas-de-impressao/problemas-comuns-de-impressao/deslocamento-de-camadas.md).
# Deslocamento de camadas
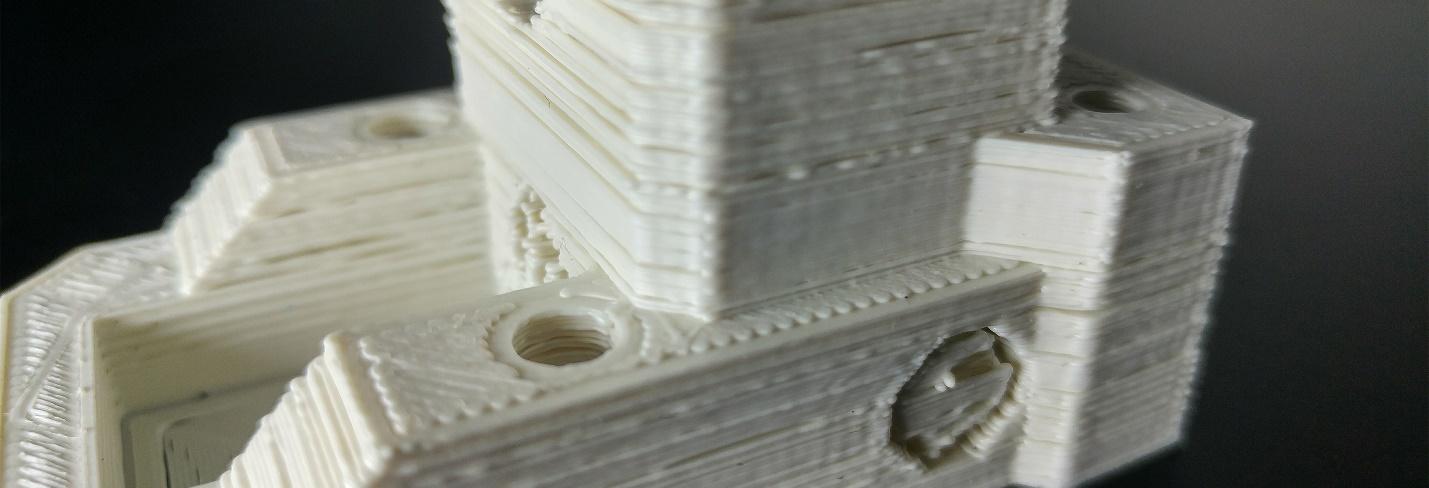
Deslocamento de camadas acontece quando a peça parece normal, mas uma ou mais camadas saem fora de posição nos eixos X ou Y. A causa pode ser algo simples, como um cabo no caminho, ou algo mais chato, como polia solta ou motor perdendo passo.
O defeito pode aparecer uma única vez ou se repetir várias vezes.
## **Deslocamento único**
Esse caso normalmente é mais fácil de diagnosticar do que quando o problema se repete várias vezes.
### **Obstrução durante a impressão**
A causa mais comum é alguma obstrução no caminho. Pode ser filamento embolado, cabo mal posicionado ou qualquer coisa impedindo o movimento livre de um eixo.
Antes de imprimir, confirme que o caminho todo está livre e que nenhum cabo vai entrar na trajetória. Também vale garantir que o filamento não vá desenrolar ou embolar durante a impressão.
Zip tie all cords in a fashion that get them out of the way of the toolpath. Anything in the way of the extruder or build plate that is stronger than your stepper motor will cause a skip, and then result in at least one layer shift.
### **Endstops fora do lugar ou área útil mal configurada**
Se o slicer estiver configurado com dimensões erradas, a impressora pode tentar ir além da área útil. Quando isso acontece, o motor perde passo ao bater no limite físico.
You can check to make sure everything is set up correctly by homing your machine. When you home the printer and it goes to the very corner of your build plate, you likely have everything set up properly (or the center for printers with a home at center).
When you home the machine, if there is accessible print area in front of or to the side of the build plate (depending on your homing setup), you are not going to be able to use the entirety of your build area.
This can easily be fixed if your X or Y endstop is just in the wrong position by slightly adjusting their location. If these endstops are fixed on your machine, the frame itself may not be set properly. Adjust any t-nuts that may be holding your bed in the position it is in and slide until in the proper homing position. Retighten and make sure nothing can rattle. You need to make sure that your printer homes in the correct spot in order to take advantage of the entire build area. You would never know there is an issue on small prints until you decide to go with a large G-code.
This can also arise if you recently swapped your hotend setup. Your printer is designed to reach its max points with the stock hotend, and if your new hotend or mount pushes the nozzle in any direction from where the stock one was, then you will no longer be able to reach the max build area of your printer. You will need to either relocate your end stops, or adjust your build volume in your slicer to accommodate. Otherwise you will think you can print a larger model than you actually can, resulting in a single or multiple layer shifts.
### **Erros no modelo ou no G-code**
Arquivos podem ser exportados de forma incorreta ou corrompidos. Vale revisar o modelo no slicer e olhar camada por camada.
Your G-code can actually be corrupted as well. This is not common but we have had prints that just would not print properly no matter what we did. This normally happens if you transfer a file before it has completely saved.
Se o erro acontece sempre no mesmo ponto do mesmo arquivo, vale refatiar e exportar o G-code de novo.
SD cards can also become corrupt. Try formatting your SD card or use a new one if continually having a problem.
### **Camadas muito altas, combing e infill**
Em alturas de camada muito grandes, o bico pode bater no preenchimento durante os deslocamentos.
Turning off combing allowed for the hotend to Z-hop after every movement and avoid this infill. We also switched from triangular infill to lines, in order to avoid the same problem. When we did not do this – we got a layer shift from the nozzle hitting the infill and skipping the stepper motor.
## **Deslocamentos repetidos**
### **Correias frouxas ou apertadas demais**
Belt harnesses on many machines are built in a way that will cause loosening over frequent printing. Some inexpensive machine harnesses only hold the belt tight via a zip-tie, though luckily this has not been as common as of late.
Correias frouxas causam folga e escorregamento. Apertadas demais podem prender o movimento e gerar outros defeitos.
You will want to make sure your X and Y carriage have belts that are very tight. You can actually over tighten them, but from our experience, a loose belt is far more common than one that is overly tight. If your belt is too tight it may cause binding and [ghosting ](/polymaker-wiki/polymaker-wiki-pt/dicas-de-impressao/problemas-comuns-de-impressao/ghosting-efeito-eco-ringing.md)(as covered in that page).
It is smart to print an adjustable belt tensioner for your carriages. This will allow for easy tightening when things get lose over time – otherwise you will likely have to disassemble. Luckily printers like the Ender 3 V2 come with belt tensioners stock, but if yours doesn’t have one, we definitely suggest adding one.
There is no specific measurement to judge if your belts are properly tight, we usually just say you don’t want any droop and want the belt to be springy to the touch. If the belt feels as though it’s stretching and has no real give – you’ve gone too tight.
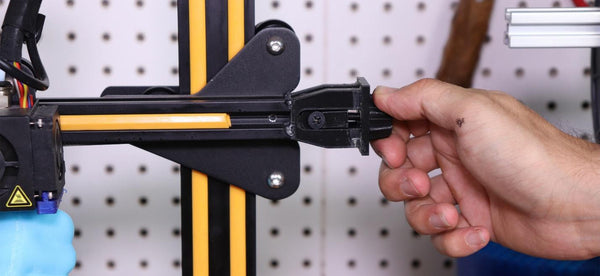
### **Parafusos da mesa apertados demais**
Ao tentar nivelar a mesa, é fácil apertar demais um ou mais cantos. Isso pode dificultar o movimento e até deformar a chapa com o tempo.
You will notice an issue when you try to move the Y carriage (on Cartesian setups) with the printer off and stepper motors disabled. When one or multiple corners are over tightened, the bed will be difficult to move.
We suggest starting fresh by loosening all of the corners until they have equal minor tension on the springs. If you now notice a big difference in how easily your bed moves, then this is likely the culprit. Get the Z-rods even by checking the distance differences for the nozzle to the bed in the X direction. Just hold one rod in place while you twist the other, leveling the X-carriage, assuming your printer has dual Z leadscrews.
Only then should you adjust the corners for a level build plate. If you have a very warped metal plate you can experience certain corners that will just not get level no matter what you do. In this instance you will actually need a new metal plate, though a bed leveler may help. This is why you do not want to leave any corner over-tightened for long periods of time. You will be slowly putting pressure on an item that may get bent over time. Using a thicker ¼”glass build plate helps to make this issue less common. The flatter your build plate is, the easier it will be to avoid this issue.
### **Guias secas ou rolamentos ruins**
Guias secas, rolamentos gastos ou roldanas apertadas demais aumentam o atrito e favorecem perda de passos.
Just rub a minor amount of white lithium grease to the rods (both threaded and smooth) and then move the carriages around so that it spreads. If you notice a drastic increase in smooth movement of your axes, then you may have fixed your issues of multiple layer shifts.
Reapplying lithium grease and checking the resistance on the rods/bearings is good practice regardless of experiencing layer shifts, since it can help to allow for consistent clean prints.
If you have a printer that has rollers moving over aluminum extrusions, such as the popular Ender 3, then you will want to make sure your rollers aren’t clamped too tight to the frame. These rollers being too loose is more common, but if your rollers are clamped so tight that it reduces movement, then you will want to loosen it slightly.
These rollers are held on by a nut on one of the rollers. This nut does not tighten when turned clockwise and loosen when turned counter clockwise. Instead one side of the nut will result in a loose carriage, one side in a tight carriage. So if you do a full 360 degree turn of this nut, you will be right back at your starting point. If you notice that the rollers are held on too tight, give the nut a 90 degree turn and then test again. You don’t want the rollers free spinning, so make sure it is tight enough to not have free play but still be able to roll smoothly.
### **Hastes tortas**
Se alguma haste estiver torta, troque.
### **Aceleração ou velocidade altas demais**
Se o esforço exigido for maior do que o torque disponível no motor, ele vai perder passo.
Most printers do not have the acceleration settings on the LCD screen anymore, but some do. That said – it is much easier now to just edit your acceleration settings in the slicer itself. Most slicers, including Cura, have this ability to edit your accelerations in the “Speed” section. You likely do not want this number over 1000 when working with Cartesian machines.
There is an exception to this now with the new fast printers on the market such as those offered by Bambu Lab. But if you do not have one of these fast machines, we do not suggest going above that 1,000 number. CoreXY and Delta machines can get much higher depending on the build quality. Manually reduce this number and see if it helps. CoreXY machines can handle a higher acceleration than Cartesian, meaning we have our CoreXY (non Bambu Labs) set to between 1000 and 1500. Delta machines can handle up to 3,000 without much of an issue. You can obviously increase from these numbers if you know your printer can handle it, such as many of the new Voron builds or new Bambu Lab options.
### **Motor ainda perde passo**
Verifique cabos, conectores, motor, driver e, se necessário, firmware.
The stepper or driver itself may be malfunctioning, so try switching the connectivity to a different axis and see if the motor still skips when moving that axis. If it does, replace the stepper to fix your layer shifting and skipping issues. If it ends up your stepper driver is malfunctioning, you can easily replace that. If you have a printer such as the Ender 3 where the stepper is integrated, you unfortunately would need a whole new board. Make sure you confirm it is the stepper driver though before going this route, and not just the stepper or a continuity issues.
It also may be worth re-flashing your firmware or going back to factory settings if this issue came out of nowhere. Flashing firmware has become much easier on machines such as the Ender 3 V2. For those machines you would just search on Creality for the most recent firmware for your particular board and printer, download and unzip the .BIN file, then transfer that .BIN file to your SD card. Turn your printer off, put in the SD card, and then turn the printer on. Your printer will now flash the most current firmware. Remember that anything you changed will now go back to factory settings, such as the E-steps. This method is only possible with newer printers, such as the Ender 3 V2, but not possible with the older version 1. For something like the Version 1, you will need to bootload, which there are tutorials online for.
### **Polias ruins ou gastas**
As polias precisam estar em bom estado e sem folga no eixo do motor.
If you buy a poorly made pulley, or notice that yours have had the grooves worn down, you will want to upgrade and purchase a new set. Go for products made from aluminum or stainless steel made products, since small items such as this are not that much more expensive, and can make a huge difference. If you do purchase a new pulley, make sure it has the correct amount of teeth. If you replace a pulley with the improper amount of teeth, your parts will all be to very incorrect dimensions or cause further layer shifts.
### **Confirme que as polias estão presas no eixo**
Your stepper motor pulley is held onto the stepper motor shaft via a grub screw (also called a set screw). If this set screw is not tightly holding the stepper motor pulley, then the stepper motor itself can turn without turning the pulley, or just slip slightly from time to time. This means that your printer will think it’s moving, but the belt isn’t turning, or at least not the proper amount.
Make sure that your grub screw is tightly holding the pulley onto the stepper motor shaft and that there isn’t any free play at all. If there is still free play even when you tighten, replace the grub screw or replace the pulley itself until it can be held on as tight as possible.
### **Mesa pesada demais**
Se a mesa estiver pesada demais para o conjunto mecânico e elétrico, o eixo Y pode começar a perder passo.
For this issue, you will either need to replace your build plate to be a lighter one or check the VREF on your Y stepper motor to confirm it is sending enough power. If you confirmed your VREF is correct, other than replacing to a lighter build plate, you would need to swap the Y stepper motor be a more powerful one.
This really hasn’t been an issue for us in a very long time, so make sure you confirm that the build plate can move freely when stepper motors are disengaged before thinking this is the culprit.
### **Bico batendo na peça**
Outra causa possível é o bico bater na própria peça e o motor perder passo nesse impacto.
This is most common when you are over extruding at very low or very high layer heights with a very strong bed adhesion.
You will want to add a Z-hop to that of your layer height, that your hotend is assembled tight and not oozing, and you will want to make sure you have your printer head avoid printed parts in your slicer settings. As mentioned earlier in this page, if you are printing at very large layer heights, you may need to tweak your infill pattern and turn off combing.
Z-hops aren’t recommended for inexpensive machines, so first try using the “Avoid printed parts when traveling” in your slicer. If you still get your nozzle hitting your print, then you can try adding a Z-hop.
### **Wobble no eixo Z**
Algumas pessoas colocam isso na mesma categoria, mas aqui tratamos `Z-wobble` separadamente. Se o defeito for esse, veja também a página sobre wobble no eixo Z.
## **Resumo para reduzir deslocamento de camadas**
* Elimine obstruções no caminho da impressão.
* Confira endstops e área útil configurada no slicer.
* Refatie o modelo se o erro for repetitivo.
* Ajuste Z-hop, combing e infill em casos extremos.
* Deixe as correias firmes, sem exagero.
* Não aperte demais os cantos da mesa.
* Lubrifique guias e troque rolamentos ou hastes ruins.
* Reduza aceleração e velocidade.
* Verifique VREF, cabos, drivers e polias.
{% embed url="" %}
---
# Agent Instructions
This documentation is published with GitBook. GitBook is the documentation platform designed so that both humans and AI agents can read, navigate, and reason over technical content effectively. Learn more at gitbook.com.
## Querying This Documentation
If you need additional information that is not directly available in this page, you can query the documentation dynamically by asking a question.
Perform an HTTP GET request on the current page URL with the `ask` query parameter:
```
GET https://wiki.polymaker.com/polymaker-wiki/polymaker-wiki-pt/dicas-de-impressao/problemas-comuns-de-impressao/deslocamento-de-camadas.md?ask=
```
The question should be specific, self-contained, and written in natural language.
The response will contain a direct answer to the question and relevant excerpts and sources from the documentation.
Use this mechanism when the answer is not explicitly present in the current page, you need clarification or additional context, or you want to retrieve related documentation sections.
 Algumas pessoas colocam isso na mesma categoria, mas aqui tratamos `Z-wobble` separadamente. Se o defeito for esse, veja também a página sobre wobble no eixo Z.
## **Resumo para reduzir deslocamento de camadas**
* Elimine obstruções no caminho da impressão.
* Confira endstops e área útil configurada no slicer.
* Refatie o modelo se o erro for repetitivo.
* Ajuste Z-hop, combing e infill em casos extremos.
* Deixe as correias firmes, sem exagero.
* Não aperte demais os cantos da mesa.
* Lubrifique guias e troque rolamentos ou hastes ruins.
* Reduza aceleração e velocidade.
* Verifique VREF, cabos, drivers e polias.
{% embed url="
Algumas pessoas colocam isso na mesma categoria, mas aqui tratamos `Z-wobble` separadamente. Se o defeito for esse, veja também a página sobre wobble no eixo Z.
## **Resumo para reduzir deslocamento de camadas**
* Elimine obstruções no caminho da impressão.
* Confira endstops e área útil configurada no slicer.
* Refatie o modelo se o erro for repetitivo.
* Ajuste Z-hop, combing e infill em casos extremos.
* Deixe as correias firmes, sem exagero.
* Não aperte demais os cantos da mesa.
* Lubrifique guias e troque rolamentos ou hastes ruins.
* Reduza aceleração e velocidade.
* Verifique VREF, cabos, drivers e polias.
{% embed url="