My Product is Not Performing as Expected
Here at Polymaker we stand behind 100% of the products we sell, so any defective or bad spool we will be happy to replace. But before we do that, we would first ask that you check out our Printing Tips to see if the issue can be solved.
Common Troubleshooting Issues:
PETG having layer adhesions
This is normally due to having an active cooling fan on or on too high. Our PETG prefers to have slow cooling for good layer adhesion.
My Nylon is Warping
This is normally due to setting the build plate temperature too high. Since we utilize our Warp Free Technology, you need to print our nylons with a build plate under 50°C. If the ambient air or build plate gets above 50°C, it can cause warping and other printing issues.
My Nylon is Printig Ugly
Along with the point to keep the build plate below 50°C, we also need to make sure that you are keeping the nylon filament dry. Nylon is very hygroscopic, which means it can absorb too much moisture within a matter of hours being exposed to open air, which is especially true if you live in a humid climate. We suggest keeping your nylon in a heated filament dryer the entire time you print. While non heated dry boxes like the AMS are better than nothing, they may not be enough to keep your nylon properly dry, particularly during long prints.
My Filament is Snapping Too Easily
This can be from the spool being wound too tight via vacuum sealing over long periods of time. If this is a brand new spool and you are having these issues, please email [email protected]. If this is not a new spool, we would recommend removing the outer 100grams of material. Regardless you can reach out to [email protected] with proof of purchase and a photo of the spool where the batch number sticker is located and we can look into replacing.
My Filament is Tangled
This is certainly not OK and shouldn't really be possible with how our neat winding works - but if you have a spool that is tangled and it caused a failed print - reach out to [email protected] with proof of purchase and a photo of the spool where the batch number sticker is located and we can look into replacing.
My ABS or ASA Print is Warping
here are a lot of ways to help prevent warping - HERE is an article we have on the topic for further info.
As a summary - here are some big tips:
Biggest tip by far is to make sure you are printing an enclosed printer. While it may be possible to print ASA or ABS without an enclosure - it is going to be VERY difficult. You will want to keep ambient air hot (45C or higher) when printing ASA or ABS to reduce any chance of warping or delamination
Make sure you have the proper initial Z-height (nozzle not too far from build plate) and that you are taking all proper bed adhesion precautions. This includes cleaning the build plate if you haven't cleaned in a while. You can use Magigoo Original since it works great. I would also suggest using a brim in your settings to help anchor. Also make sure you print slower on your first layer.
Print slow. Printing slow will help give more time for the material to slowly release its stress - so printing slower will always help with layer adhesion and preventing warping.
Print hot. Printing on the higher end of the recommended printing temperature range will also help to prevent warping and delamination.
Print with a larger diameter nozzle. The larger the nozzle - the less the material will be stretched/stress, meaning warping and delamination will be less likely to occur.
Turn off or turn cooling fans way down - we want parts to cool slowly to help reduce this stress release causing warping and delamination.
Please keep in mind - having the ambient air be hotter and just keeping the print overall hotter will help a lot with layer adhesion and warping but it could make printing overhangs more difficult. You will be battling between having super clean overhangs and strong layers - it is difficult to avoid this entirely.
My CoPE is Sticking Too Well to Textured PEI Build Plate
We am very sorry for this poor printing experience with our Panchroma CoPE! We have done our best to include the issues with printing CoPE to textured PEI plates as much as possible on our site and elsewhere: https://us.polymaker.com/products/panchroma-cope-regular
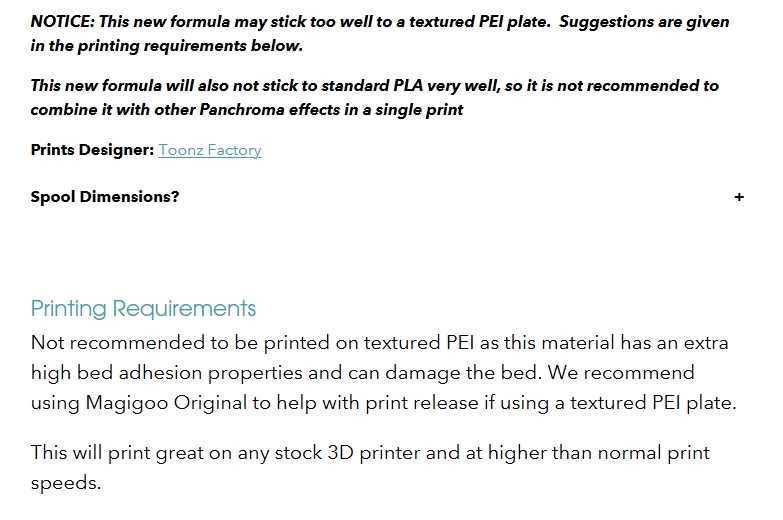
You can use a textured PEI plate and print with CoPE - you will just need to add either Magigoo, Vision Miner Nano, or even just some hairspray and prints should release much easier.
My PolyDryer is Not Working Properly
If you can run the dryer at the highest 3rd setting for 12-24 hours, and your desiccants turn orange, then normally the PolyDryer is performing as expected.
If you are unable to either dry the desiccants nor the filament, then please reach out to us at [email protected] with your proof of purchase and the serial number located on the underside of the dryer.
- Other common issues - Please refer to Common Printing Issues for more information.
If you are unable to solve your problems via these suggestions and links, please email us at [email protected] and we will either help diagnose your issue or get you a coupon code for a replacement spool.
More Unique Troubleshooting Issues:
Issues Printing Polycarbonate
Polycarbonate can be a tricky material to print with. Basically it needs to be cooled EXTREMELY slowly to avoid any warping or cracking if you do not have a high heat actively heated chamber.
To do this - first and foremost - it requires an enclosed printer that can maintain a high ambient air temperature. PC actually would print best with a chamber temp of 90˚C, but most printers will max out with passive heating of an ambient air temp of around 60˚C. The hotter you can get the chamber before starting, the better. So we would suggest heating the build plate to 105˚C and leave the doors and tops on the printer closed for 15 minutes before starting the print. This will allow the ambient air temps to heat up as much as possible before starting to print. This then allows the print to stay hot and not rapidly cool.
The same would be true for any active cooling fans - all cooling fans should be off to prevent any rapid cooling.
Next - we would highly suggest using Magigoo PC: https://magigoo.com/products/magigoo-pc/
Next it is important to note that you need to anneal polycarbonate right when the print completes. As mentioned, we want PC to cool very slowly, so the best method for this would be to allow the print to sit in 90˚C ambient air temps and let it slowly cool to room temperature. So if you are using a standard desktop FDM printer, when the print finishes, the ambient air temps will cool too rapidly. So have your oven ready at 90˚C and take the print right when it finishes and put it directly into the oven. You may need to place the build plate in the oven with the print since removing the print while the build plate is hot may be difficult.
You would then leave the print in the oven for 2 hours before turning the oven off. Then leave the print in the oven as it slowly cools to room temperature.
Taking the above precautions should make it so that the polycarbonate slowly cools and does not crack.
Other tips are:
1. Print slow
2. Print with a nozzle at the top end of our recommended print temperatures
3. Use a larger diameter nozzle. Larger nozzles will cause less stress creation in the first place meaning less chances of warping and delamination.
So to summarize - you want to keep PC hot for as long as possible and have it cool for as slowly as possible. This will be most noticeable on large and dense prints. Keeping a very small print hot enough to not crack is a lot easier than a really large dense cube.
Issues Printing CoPA
This material can be a bit difficult to print with, but it should be achievable to get clean prints with most machines.
The first issue is getting overhangs to print well. CoPA does not deal with overhangs well, so we would suggest printing models with the least amount of overhangs possible. Since CoPA also has a very strong layer adhesion, you can then print with dissolvable or breakaway supports for extreme angles, since parent support material can prove to be difficult to remove.
CoPA can also be a bit finicky with printing temperature, meaning it has a very low temperature range depending on your print speeds. The faster you print, the more you will need to increase printing temperatures, but you will need to hone in to find the perfect temperature for your printing speeds. Personally we print at 50-60mm/s and with a nozzle at 260C. If having issues, you can always print slower.
When it comes to bed adhesion - CoPA performs great with a build plate below 50C and a small amount of glue stick. CoPA utilizes our Warp Free Technology, which will mean that you do not want a build plate or ambient air temperature above 50C. If you go above 50C, you can actually cause warping and other printing issues, but if you are below 50C with some glue stick, it should not warp at all.
CoPA is also very hygroscopic, meaning it can absorb too much moisture by just being out in the open for a couple of hours. This is why we suggest only printing CoPA while it is kept in a filament dryer the entire time you print. A 70C filament dryer is best, though 50C can work if the filament was dried before using. If the filament has absorbed moisture, keep it at 70-80C for 12-24 hours before printing in either a filament dryer or your oven. If you are hearing any popping noises when printing, the material likely absorbed too much moisture.
Finally you will want to anneal the print for 6 hours at 80C. This will help the part get its full mechanical strength properties. You can then moisture condition the part after annealing. We do not recommend dipping CoPA directly into liquid water and instead keep the part in a humid climate for 1-2 weeks.
Issues Printing LW-PLA
We actually have a bunch of LW PLA discussions on our discord: https://discord.polymaker.com/
We also have some profiles, including for the A1, on the product listing under the "Print Settings" tab: https://us.polymaker.com/products/polylite-lw-pla
Here is some feedback we see on stringiness issues some are having on that Discord:
It is challenging to print LW-PLA without any stringing, my usual settings are:
190˚C printing temperature (at 50mm/s printing speed)
Maximum travel speed
0.5mm coasting and 1mm wiping (depending on the model)
(I usually don't change much the retraction)
My Part is Not Water Tight
Watertight prints should be possible with nearly every material - just a matter of honing in the right settings. Generally if watertight is your goal - we want to print on the slower end and we don't want our retraction settings too high.
Issues Printing Support Material on Single Nozzle Printer
Unfortunately we do not recommend using PolyDissolve or any multi material printing when using a single nozzle printer such as a Bambu Lab machine with their AMS. That setup is best for multi color prints with a single material type.
This is because when you run two different material types out of a single nozzle, your risk of clog or under extrusion due to a minor clog, is drastically increased. You will definitely want to have a very high purge amount if you do go this way, but we always suggest to use a printer with multiple tool heads, such as an IDEX or Tool Changer when running a print with two different materials such as this.
Aside from the tip that printing out of a single nozzle can cause a lot of potential clogging issues, here are some others that will help to get PolyDissolve and PLA to stick properly. I have actually done extensive testing on this, and this is what I found to work:
Keep the PolyDissolve dry the entire time you print since it is very hygroscopic
Reduce Z-Gap for supports to 0
Use support interface. If you are using PolyDissolve as the main support structures, you can get away with around 15%. If you are using the other material as the main structures, bump that up to 20-25%. For support interface I use 75-80% in a grid pattern. This will allow for some little holes for the other material to fall into and add a bit of a mechanical adhesion. When printing at 100% support interface we would just be relying on the materials chemical ability to stick to eachother.
Print the PolyDissolve slowly. Around a max of 40mm/s. You may be able to go slightly faster but this would be a safe limit to make sure you are getting good adhesion between the two materials. This would mean I would cap the max volumetric flow rate on a Bambu style printer to around 4-5mm^3/s. This is obviously quite slow but is important to get those materials to stick together.
Having Issues Burning Out PolyCast
The burnout temperature for our PolyCast is 1,100 - 1,200C to entirely burnout. You can find more information on this on page 7 of our application notes for this material: https://cdn.shopify.com/s/files/1/0548/7299/7945/files/PolyCast_Application_Note_V1.pdf?v=1640965091
There is another individual though - a YouTuber - who pretty much exclusively uses PolyCast - Press Tube. He uses a kiln that cannot reach those temperatures and gets the PolyCast to work. Here is a link to a video of his where he goes over how he gets it to work while not being able to reach that temperature:https://www.youtube.com/watch?v=QeNMc_THrow
We believe he just needs to do the burn for a much longer amount of time, but you can check that video for his tips.
Last updated
Was this helpful?